Showing posts with label Foodies. Show all posts

Thursday, February 4, 2016

Seven Desserts Perfect for Valentine's Day


With Valentine's Day being less than two weeks away, it's time you start making your plans. Whether you plan on spending it with your special someone, your gal pals, or simply relaxing at home with your favorite furry friend, there's no excuse not to indulge in a few decadent sweet treats. Last year Ryan planned a romantic date night where we visited all of my favorite spots in the city, but this year I'm leaning towards a quiet evening at home by the fire {and of course, some chocolate and wine}. What are your plans this Valentine's Day?

Monday, November 3, 2014

Recipe :: Weeknight Coq Au Vin


Last week I had a couple of girlfriends over for a Parisian evening.  We ate French cheese, drank French wine, listened to French music, talked about France, and ate French food.  My friend brought over the most delicious Potato Dauphinoise for our side, and for our main dish I decided to take a stab at making Coq Au Vin.  It paired perfectly with the potatoes and I served it with some big homemade croutons to soak up all the delicious wine sauce.  The traditional Coq Au Vin uses mostly chicken legs and thighs, but since I prefer white meat and had a few organic chicken breasts in the fridge I used those instead.  I will admit, that it turned out to be so delicious I didn't even have time to photograph it!

Tuesday, September 30, 2014

In the Kitchen :: Five Recipes for Fall


Well hello there!  Sorry for my unexpected absence yesterday, a weekend back at my alma mater plus coming home to a swelteringly hot house on Sunday night {requiring us to sleep in the living room} left me a total zombie yesterday.  Thankfully we opened the windows and were much more comfortable last night...it's amazing what a good night of sleep will do for your energy levels!  Anyways, I'm back today sharing with you five fall recipes that I'm absolutely drooling over.  Looking for more food inspiration?  Check out my Pinterest board :)

Thursday, September 11, 2014

Recipe :: Heirloom Tomato Tart


I don't know if it's just me, but I get a literal high every time I am at the farmers market.  Perhaps it's the combination of gorgeous and fresh produce, the fact that everyone there is always smiling, and knowing that I'm supporting local businesses...but it seems like no matter how much money I bring there I never fail to spend it all.

Late summer is really when Indiana produce shines, so this past Saturday I picked up an inordinate amount of produce {you'd think I was feeding a family of five!}  It's hard to pick a favorite, but the beautiful heirloom tomatoes might just win the prize for my favorite September vegetable.  Using a few of the tomatoes I decided to throw together a quick heirloom tomato tart.  Served with arugula dressed in olive oil, cracked pepper, and Maldon sea salt flakes, it makes for a delicious and somewhat indulgent lunch.  Enjoy!

Thursday, July 3, 2014

In the Kitchen :: Fourth of July Recipes


We're currently in Breckenridge, CO to celebrate the Fourth of July and attend my cousin's wedding in the mountains.  If you're still not sure what you will be making for your Fourth of July festivities, I have rounded up some drool-worthy recipes that will be sure to please a crowd even on the hottest summer days.  Bon appétit!


Thursday, June 5, 2014

Recipe :: Ginger Berry Chia Seed Pudding


After having friends over on Tuesday night and making The Artful Desperado's wickedly delicious {but wickedly sinful} Salted Chocolate Diablo Cookie Ice Cream Sandwiches, the following morning I felt the need for a super healthy breakfast.  I have been putting Chia Seeds in my smoothies for quite some time {they are packed with fiber and vitamins}, but decided to follow Camille Styles' recipe and make Ginger Berry Chia Seed Pudding...and I couldn't have been more pleased with the results!  I loaded mine with berries and nuts, but I could see a dozen different variations that could easily take it from breakfast to dessert.

Ginger Berry Chia Seed Pudding (Recipe via Camille Styles)
Serves 1

INGREDIENTS
1/2 cup + 2 tablespoons almond milk (or the milk of your choice)
2 teaspoons honey
2 tablespoons chia seeds
6 – 8 raspberries, blackberries or blueberries, plus more for topping
1/2 teaspoon finely grated orange zest
1/4 teaspoon finely grated fresh ginger
1/8 teaspoon vanilla extract
Pinch of kosher salt
Nuts or seeds for topping (I love a mixture of slivered almonds and hemp seeds.)

INSTRUCTIONS
In a mason jar or other container with tight fitting lid, combine almond milk and maple syrup. Shake to combine.

To the jar, add next 6 ingredients. Shake well, then refrigerate for at least 4 hours or overnight.  During the first 2 hours of chilling, shake well every 30 minutes to evenly distribute the chia seeds.

The pudding is ready when it’s very thick.  Pudding keeps for up to 3 days in the fridge.

Thursday, May 22, 2014

In the Kitchen :: Five Brunch Recipes


On those few weekends where we actually don't have any plans {or weddings!!} there is almost nothing I love more than a lazy, leisurely brunch.  I love waking up and looking through my cookbooks or Pinterest Board to find a new recipe to try, biking to the farmers market to pick up any extra ingredients I may need, and wasting away the morning with a hot cup of tea and a delicious breakfast.  Luckily for Ryan I am an early bird and will often have the whole thing ready before he even gets out of bed :)


Thursday, May 1, 2014

In the Kitchen :: Five Recipes to Try for Spring


Happy May 1st!  I for one couldn't be more thrilled that Spring is finally here to stay, and with that comes the opening of outdoor Farmers Markets!  Our local market opens up this Saturday and I absolutely can't wait to scoop up fresh spring produce and try a few new recipes.  I've rounded up five that I am most excited to make, including a wickedly delicious ice cream sandwich.  Have a great day!


Thursday, April 10, 2014

Recipe :: Jeni's Lemon Cream Ice Cream


As a graduate of Ohio State University, I spent four years of my life exploring the Midwestern city of Columbus, OH. The second year of school my mom took me to a new ice cream stand she had heard about in our local market, and this stand ended up being owned by the infamous Jeni Britton Bauer of Jeni's Splendid Ice Creams. Since then Jeni has opened sixteen brick and mortar shops across the Midwest, sells her artistic flavors such as Queen City Cayenne, Wild Berry Lavender, and Goat Cheese with Roasted Red Cherries at fine grocers nationwide, and published a best-selling cookbook. I picked up her book, Jeni's Splendid Ice Creams at Home, for my mom a few years ago and I have to say, if you love ice cream and have any sort of desire to make it at home you MUST buy this!

My mom has cooked her way through Jeni's cookbook in which she literally breaks down each of her flavors to an exact science {you will learn more about ice cream than you ever knew was possible}. I was nervous to try to recreate one of her flavors, worried that there was no way the ice cream could turn out as delicious as the real thing...but was I ever wrong! It is literally the creamiest, most indulgent, creative ice cream I have ever eaten.

This past Sunday I went home to find my mom making a batch of Lemon Cream Ice Cream, and as expected it was absolutely fabulous. The perfect combination of sweet and tart, it was a refreshing spring treat served with fresh berries {and if you have homemade shortcake, even better!}  I loved the recipe so much I just had to share it with you all :)

Lemon Cream Ice Cream (recipe via Jeni's Splendid Ice Creams at Home)
Makes about 1 quart

LEMON SYRUP INGREDIENTS
2-3 lemons
2 tablespoons sugar

ICE CREAM BASE INGREDIENTS
2 cups whole milk
1 tablespoon plus 1 teaspoon cornstarch
1.5 ounces (3 tablespoons) cream cheese, softened
1/8 teaspoon fine sea salt
1 1/4 cups heavy cream
2/3 cup sugar
2 tablespoons light corn syrup
Zest of 2-lemons (reserved from above)

INSTRUCTIONS
Prep for the lemon syrup: Using a vegetable peeler, remove the zest from 2 of the lemons in large strips; reserve. Halve the lemons and squeeze enough juice to make 1/2 cup. Combine the lemon juice and sugar in a saucepan and bring to a simmer over medium heat, stirring until the sugar is dissolved. Remove from the heat and refrigerate until chilled. This won't be a very thick syrup. 

Prep for the ice cream base: Mix about 2 tablespoons of the milk with the cornstarch in a small bowl to make a smooth slurry. Whisk the cream cheese and salt in a medium bowl until smooth. Fill a large bowl with ice and water. 

Cook: Combine the remaining milk, the cream, sugar, corn syrup, and lemon zest in a 4-quart saucepan, bring to a rolling boil over medium-high heat, and boil for 4 minutes -- watch it closely and stir occasionally to make sure it doesn't boil over. Remove from the heat and gradually whisk in the cornstarch slurry. Bring the mixture back to a boil over medium-high heat and cook, stirring with a heatproof spatula, until slightly thickened, about 1 minute. Remove from the heat. 

Chill: Gradually whisk the hot milk mixture into the cream cheese until smooth. Pour the mixture into a 1-gallon Ziploc freezer bag and submerge the sealed bag in the ice bath. Let stand, adding more ice as necessary, until cold, about 30 minutes. 

Freeze: Remove the lemon zest. Pour the ice cream base into the frozen canister and turn on the machine. Pour the lemon syrup through the opening in the top of the machine, and continue to spin the ice cream until thick and creamy.   Pack the ice cream into a storage container, press a sheet of parchment directly against the surface, and seal with an airtight lid. Freeze in the coldest part of your freezer until firm, about 4 hours.  Enjoy!

Friday, April 4, 2014

Recipe :: Spring Asparagus Risotto with a Fried Egg


One of my favorite go-to's when I "don't have anything to make for dinner" is risotto.  It can be made about a million and one ways {I love it with butternut squash in the fall and kale in the winter}, but I think it really shines with fresh spring produce.  While cleaning out the refrigerator before we left for vacation I found that I had a bunch of fresh asparagus and basil that needed to be eaten.  That, plus some eggs, frozen organic vegetables, and a few pantry staples, ended up making a delicious dinner for two!  Feel free to modify with your favorite vegetables, cheeses, etc.  

Spring Asparagus Risotto with a Fried Egg
Serves 4

INGREDIENTS
1 cup arborio rice
3 cups organic chicken {or vegetable} broth - approx
1.5 cups dry white wine - approx
1 tablespoon butter
1/2 red onion, chopped
3 garlic clove, minced
4 large eggs
Kosher salt
Fresh cracked pepper
Olive oil
1 pound spring asparagus
3/4 cup frozen organic peas, thawed in warm water
1/2 cup frozen organic corn, thawed in warm water
Fresh basil, chopped
Grated Parmesan cheese

INSTRUCTIONS
Preheat oven to 425 degrees.  Bring chicken broth to a boil in a medium sauce pan, then reduce to a simmer.  Meanwhile, heat butter in a large sauté pan over medium heat.  Add chopped onion and sauté for two minutes.  Add arborio rice and sauté until golden brown and slightly translucent.

Alternating between hot chicken broth and white wine, add 1/2 cup of liquid to risotto and stir until reduced.  When the liquid has been absorbed, continue to add more, until the risotto is soft, creamy, and will not absorb any more liquid {typically takes about 20 minutes, you may need more or less liquid than the quantities listed above}.

Meanwhile, break the tips off the asparagus and cut into medium-sized pieces.  Toss with olive oil, salt, and pepper, and roast in the oven for about 10-15 minutes {you want to make sure the asparagus are still bright green and crisp, yet slightly tender}.

Three minutes before the asparagus are ready heat a skillet over high heat and drizzle with olive oil.  Cook the eggs to your liking {I typically fry mine for about three minutes on one side then flip over and cook for another 10 seconds}.  Remove from heat.

Remove asparagus from oven and toss with risotto.  Add drained peas and corn and toss.  Add parmesan cheese, salt, and pepper to taste.  To serve, sprinkle with fresh basil and top with a fried egg.  Bon appétit!

Friday, March 14, 2014

Recipe :: Thomas Keller Oreos


One experience that is high on my bucket list: eating and drinking my way through California's Wine Country.  When I do, I will most definitely be visiting Thomas Keller's famed The French Laundry for dinner and stopping by his Bouchon Bakery {at least once} for breakfast.  Knowing this, my best friends mom bought me a signed copy of Keller's beautiful Bouchon Bakery cookbook for my birthday last year.  I spent hours just flipping through the amazing photos and reading about Keller's life.  However, his recipes are very, very detailed and complex...so for the past 9 months it has remained unused as I was honestly extremely intimidated to dive it.  But, after our trip to NYC this past Christmas and visiting Bouchon first hand, I realized how unbelievably amazing his treats were and knew I had to give one of them a shot.  So, I decided to take a stab at my favorite treat, his famed TKOs {aka Thomas Keller Oreos}.  

The chocolate shortbread cookies themselves turned out absolutely fantastic.  Seriously, you know a cookie is going to be good when you are literally nauseated by consuming so. much. dough.  The creme was made with a white chocolate ganache, and to be honest, didn't turn out quite as I had planned.  I am absolutely sure that this was due to a mistake on my end {I didn't have quite the right amount of white chocolate, wasn't able to weigh my ingredients, etc.}, because if you read the reviews on Amazon it is clear that Keller is a genius and his recipes {if followed correctly} are foolproof.  It was my first take at ganache so I expected that it wouldn't turn out quite perfect.  But, trust me...if made correctly these babies are unstoppable!

PS - If you haven't entered to win a gorgeous print of your choice from Hannah Gentiles, don't forget to do so here!

TKOs {recipe via The Bouchon Bakery Cookbook}

WHITE CHOCOLATE FILLING
4.4 ounces (125 grams) white chocolate, chopped
0.5 ounces (15 grams) unsalted butter
1/2 cup + 1 teaspoon (125 grams) heavy cream

CHOCOLATE SHORTBREAD
1 3/4 cups + 1 1/2 tablespoons (259 grams) all-purpose flour
1 cup + 1 1/2 tablespoons (87 grams) unsweetened alkalized cocoa powder
3/8 teaspoon (1.6 grams) baking soda
8 ounces (227 grams) unsalted butter
2 teaspoons (6 grams) kosher salt
3/4 cup + 1 tablespoon (161 grams) granulated sugar
3 inch fluted cookie cutter {I used this}
Pastry bag with a *recommended* 3/16-inch plain tip

FOR THE FILLING
Melt the chocolate and butter together, stirring constantly.  Meanwhile, bring the cream to just under a simmer.  Pour the cream over the melted chocolate and whisk to combine.  Pour into a container and refrigerate for at least 4 hours, or up to 1 day, until completely chilled.

FOR THE SHORTBREAD
Place the fliur in a medium bowl, sift in the cocoa and baking soda, and whisk to combine.  Place the butter in the bowl of a stand mixer fitter with the paddle attachment.  Turn to medium-low speed and mix until smooth.  Add the salt and mix for another 15-30 seconds.  Add the sugar and mix for about 2 minutes, until fluffy.  Scrape down the sides and bottom of the bowl.

Add the dry ingredients in 2 additions, mixing on low speed for 15-30 seconds after each, or just until combined, then mix until the dough begins to come together.  

Mound the dough on the work surface and, using the heel of your hand or a pastry scraped, push it go ether into a square block.  Wrap in plastic and refrigerate for at least 1 hour, until firm.  (The dough can be refrigerated for up to 2 days or frozen for up to 1 month).

Position the racks in the upper and lower thirds of the oven and preheat the oven to 325 degrees F.  Line two sheet pans with parchment paper.

Unwrap the dough and place it between two pieces of plastic wrap.  With a rolling pin, pound or roll out the dough to flatten it, turning at 90 degree angles frequently (to prevent the dough from cracking as it's rolled).  Roll out to a 1/8-inch-thick sheet.

Using the fluted cutter, cut rounds from the dough.  If necessary, push the trimmings together, refrigerate until firm, and reroll for a total of 16 rounds.  If the dough softens, return to the refrigerator until the cookies are firm.  Arrange the rounds on the pans with about /4 inch between them.

Bake for 15-17 min, turning the pans around halfway through, until the cookies are fragrant with small cracks on the surface (because the cookies are so dark, it can be difficult to tell when they are done).  Set the pans on a cooling rack and cool for 5 - 10 minutes, then transfer cookies to the rack to cool completely.

TO ASSEMBLE
Place the filling in a bowl and beat until smooth.  Transfer to the pastry bag.  Turn half of the cookies over.  Pipe 1/2-inch long teardrops in a ring on each one, beginning 1/8 inch from the edges of the cookie, and then working toward the center to cover the cookie.  Top each with a second cookie and press gently to sandwich the cookies.  Enjoy!

Thursday, February 6, 2014

Recipe :: Buttermilk, Lemon, and Poppy Seed Quinoa Pancakes


As a long-time follower of Béa Peltre's blog, 'La Tartine Gourmande,' I was thrilled when she came out with her self-titled cookbook.  The photographs and recipes were just as beautiful as those on her blog, and I love how Béa included a special memory to go along with each recipe.  I have made {and loved} a few recipes out of her book, but one of my resolutions for this year is to stop reaching for Pinterest every single night to decide what to make for dinner and instead start using my plethora of cookbooks more.

This week I made her recipe for Buttermilk, Lemon, and Poppy Seed Quinoa Pancakes and they did not disappoint.  They were the perfect combination of that golden crispy exterior with a soft and cake middle.  The addition of lemon and poppy seed gives the pancakes a slightly elevated flavor, while the addition of quinoa flour pumps up the healthy quotient a notch or two.  One thing I love about this recipe is the flours can easily be substituted for others you have around the house.  I didn't have quinoa flakes so instead I subbed with ground almonds, and instead of white rice flour I used whole wheat flour.  I also didn't want to buy a bottle of buttermilk {every time a recipe calls for it I buy a bottle, never use more than a cup, and it ends up getting spoiled} so I followed this recipe and actually made mine.  And of course you could switch it up and flavor the pancakes with banana & chocolate chips, pumpkin, apples & cinnamon...the possibilities are endless!

Note: If you are at all interested in learning more about food photography and styling, Béa conducts a few workshops across the globe each year.  Her next workshop?  A three-day retreat in PARIS.  Details are here...who wants to go with me?!

Buttermilk, Lemon, and Poppy Seed Quinoa Pancakes {recipe via La Tartine Gourmande}
Makes fourteen to sixteen 4-inch pancakes

INGREDIENTS
1/3 cup white rice flour or sweet rice flour {substituted with whole wheat flour}
1/3 cup quinoa flour
1/3 cup quinoa flakes {substituted with ground almonds}
2 tablespoons blond cane sugar
1 teaspoon baking powder
1/2 teaspoon baking soda
2 pinches sea salt
2 tablespoons poppy seeds
Finely grated zest of 1 organic lemon
2 large eggs, separated
1 cup buttermilk {I made my own with this recipe}
1/2 teaspoon lemon extract {I used lemon juice}
1 tablespoon canola oil, plus more to cook the pancakes

DIRECTIONS
In a bowl, combine the flours, quinoa flakes, sugar, baking powder, baking soda, a pinch of sea salt, poppy seeds, and the lemon zest {save a little to sprinkle on top of pancakes when serving}.

In another bowl, beat the egg yolks with the buttermilk.  Beat in the lemon extract, if using, and the oil.  Add this mixture to the dry ingredients and stir to combine.

In a third bowl, beat the egg whites with a pinch of sea salt until soft peaks form.  Fold the whites into the batter.

In a frying pan, heat 1 tablespoon of canola oil over medium heat.  Pour 1/4 cup of batter in the pan and repeat for as many pancakes as the pan can hold.  Cook until bubbles form on the surface, then flip the pancakes and continue to cook for 1-2 minutes, until golden.

Sprinkle the pancakes with remaining lemon zest and serve with warm maple syrup, honey, powdered sugar, fresh berries, or whatever toppings you enjoy.  Bon appétit!

Photography by Molly {I'm really trying to get the hang of this new camera!}

Thursday, January 9, 2014

Recipe :: Sweet Potato & Quinoa Salad with Soft Boiled Eggs


After our Christmas butter overload {both of these cookie recipes called for two+ stick of butter each...yikes} I am in serious need of some power food.  Enter Naturally Ella and her amazing Sweet Potato & Quinoa Salad with Soft Boiled Eggs recipe.  It was so easy and turned out absolutely delicious.  It's great for vegetarians {the egg and quinoa amp up the protein} but satisfying enough for meat-lovers like my boyfriend.  Recipe below.


Sweet Potato & Quinoa Salad with Soft Boiled Eggs {via Naturally Ella}

SWEET POTATOES:
1 medium sweet potato
½ medium onion
½ tablespoon olive oil
1 tablespoon fresh rosemary, minced

QUINOA:
½ cup uncooked quinoa
1 cup water

SALAD:
2-3 handfuls of lettuce
⅓ cup gorgonzola
¼ cup sunflower seeds
1 tablespoon olive oil
1 tablespoon balsamic vinegar
2-3 eggs

INSTRUCTIONS:
Preheat oven to 400˚. Cube sweet potato and onion. Toss with ½ tablespoon olive oil and rosemary. Roast until tender, 20-25 minutes.

Rinse quinoa and combine with water in a sauce pan. Bring to a boil, reduce to low heat, cover, and let cook for 15 minutes. Remove from heat and let sit for another 5 minutes, still covered.

Let sweet potatoes and quinoa cool while making soft-boiled eggs.

Bring a pot of water to a boil and reduce to a fast simmer. Add eggs and let cook for 5-7 minutes (5 minutes for runny yolks, 7 minutes for slightly firmer yolk). Remove and place in an ice bath for 60 seconds.

In a large bowl combine lettuce, sweet potatoes, quinoa, sunflower seeds, and gorgonzola. Drizzle olive oil and balsamic vinegar over salad and toss together. Top salad with eggs.  Enjoy!

Image via Naturally Ella

Tuesday, January 7, 2014

Travel :: NYC Part II

Oh New York, how you won my heart with your amazing architecture, delicious food, and contagious energy.  I spent the second day of my trip wandering around Midtown and catching up on my reading in the stunning New York Public Library.  Seriously, this had to have been one of my absolute favorite buildings I have ever been in.  The chandeliers, the beautiful molding, the windows overlooking the city, the endless rows of books, and let's not forget the heavenly mosaics...let's just say I will never be able to look at the Indianapolis Public Library the same way again.  Before meeting Ryan I stopped by Bryant Park to watch to watch the skaters and stroll through the Christmas Market.   Afterwards Ryan and I went ice skating in Central Park {see pictures here} then headed south to the Ace Hotel for dinner at The Breslin {the Winter Vegetable Salad with Pecorino Sardo & Charred Onion Vinaigrette was out of this world}.

Monday, November 25, 2013

Recipe :: The BEST Apple Pie, Ever

I cannot believe that Thanksgiving is on Thursday!  November has just flown by, and before we know it Christmas will be here too.  I am trying to savor every moment of the holiday season, because it always just seems to go by too fast.  One thing I look forward to the most about this time of year is my mom's Apple Pie.  Seriously, it is legendary.  The recipe has been passed down in our family, and as you can see below the recipe itself has definitely seen it's share of spills and dirty fingers.  Thankfully my mom made me a new recipe to go inside the cookbook that she made for me when I turned 21 {all hand-written and illustrated...she is the best!}  So without further adieu, here is the recipe for {in my humble opinion} the BEST Apple Pie, EVER.

The BEST Apple Pie, Ever

CRUST: 
1 1/4 c. shortening {chilled}
3 c. flour
1 teaspoon salt
Approx. 5 tablespoons ice water
1 egg, beaten well
1 tablespoon vinegar

In a large bowl, mix salt and flour.  Cut in chilled shortening with two knives until it starts to mix -- blend the rest of the way with a pastry blender until the texture resembles coarse sand.  Don't over mix!

Add egg and vinegar, mix with fork.  Add ice water, 1 tablespoon at a time, mixing with fork until blended.  Dough should be pretty moist.  

Form into ball and wrap with plastic wrap.  Chill in fridge for one hour.  Divide in half - roll out bottom half to fit pie plate bottom and other half for the top.

FILLING:
1 c. sugar
1 teaspoon cinnamon
1/4 teaspoon salt
1 teaspoon lemon rind, grated
1/4 teaspoon nutmeg
3-4 tablespoons flour
7 c. peeled, sliced apples {mostly Granny Smith}
1 tablespoon lemon juice
2 tablespoons butter

Heat over to 400 degrees.

Combine sugar, salt, cinnamon, nutmeg, flour, and lemon rind in a small bowl.  Put apples in a large bowl and pour lemon juice over.  Mix dry ingredients in with apples, mix well.  Taste and add more spices as you see fit.

Pour apples into prepared pie crust.  Dot with four or five pats of butter.  Put crust on top and pinch the crust with your thumb and first finger from one hand and first finger from other hand.  Repeat until crust resembles photo below.  If desired, use a little extra dough and a fun cookie cutter to put a few decorative shapes on top {I like to use little leaves or stars}.  Draw a happy face with sharp pairing knife, to make sure steam can release from pie.

Bake on middle rack -- 400 degrees for 10 minutes then turn oven down to 350 degrees.  Bake for another 40-50 minutes until crust is golden brown and apples are bubbly.  Turn once or twice while cooking to ensure all sides are cooked evenly.

Let cool, serve with your favorite vanilla ice cream {I love Jeni's Ndali Estate Vanilla Bean}.  Enjoy!

Thursday, October 24, 2013

Recipe :: Fall Leaf Cookies

Today I am very excited to share with you my favorite family tradition.  My mom and I have been making these cookies {recipe from a 1993 issue of Martha Stewart Living} since I was in first grade.  Twenty years later we have made them together every year, minus one {sorry Mom!}  These leaf cookies are always a crowd pleaser, I swear every year I make them people tell me I should open up my own bakery.  The best part about them is while they are quite impressive to look at they are so so so easy {I know a lot of people say that, but in this case it really is true}!  

Fall Leaf Cookies

Makes approximately 40 large cookies, 60 small

COOKIES (Recipe via)
6 egg yolks
4 eggs
2 cups butter, softened
2 1/8 cups white sugar
7 cups all-purpose flour
1 tablespoon baking powder
1/2 teaspoon salt
1 1/2 teaspoon vanilla extract

In a large bowl cream together the butter and sugar until smooth.  Beat in the eggs, one at a time, mixing well after each.  Add the vanilla.  Combine flour, baking powder, and salt - stir into sugar mixture.  Cover dough and chill for at least one hour.

Preheat the oven to 375 degrees F (190 degrees C).  Grease cookie sheets or cover with parchment paper.  On a floured surface roll the dough out to 1/2 inch thick and cut into desired shapes using leaf cookie cutters.  Place 2 inches apart on the prepared baking sheets.

Bake for 8-10 minutes in the preheated oven.  Allow cookies to cool on baking sheet for 5 minutes before removing to a wire rack to cool completely. 

ICING {Recipe via}
6 cups sifted confectioners sugar
6 large egg whites (we use powdered whites, just to be safe)
Almond extract to taste
Food coloring

Put sugar in a mixing bowl.  With the mixer running slowly add the egg whites, allowing sugar to absorb them.  Add just enough egg whites to get a smooth, slightly liquid consistency (you may not need all 6).  Add almond extract and mix well.

Divide icing into small bowls and add food coloring as desired (we typically make red, yellow, green, and orange for these cookies).

ASSEMBLY
We love to play around when decorating these cookies, and since the icing is a nice, smooth consistency it allows us to swirl the icing to create a veiny or ombre-esque effect.  

To create our "standard" cookie as photographed below, I typically spread one color on one side and a different on the other, leaving about a quarter inch in the center bare.  Using a toothpick add a third color to the center of the cookie.  Make sure you use enough icing so all of the colors are easy to swirl and work with.  With your toothpick, lightly "pull" the center color through each side, creating the look of veins.  Continue until you have reached the desired effect. 

Let dry, and watch your friends be amazed!

Wednesday, July 31, 2013

Goat Cheese Roasted Chicken

On Monday night my friend and I decided to make dinner at home for our guys.  Both of us love trying new recipes, and since neither of us had ever actually roasted a chicken before we figured why not give it a shot!

We decided on a recipe by "How Sweet It Is" for Goat Cheese Roasted Chicken, and not to toot my own horn, but it was literally the most delicious roasted chicken I have ever eaten!  It was perfectly moist and tender on the inside with a crisp golden exterior and the perfect layer of herbed goat cheese hiding under the skin.  We paired it with herbed basmati rice, lemon asparagus, and an ice cold bottle of Rose, and I have to say it was the perfect summer meal al fresco in her gorgeous back yard.

Recipe below...PS - Follow Dreams in HD on bloglovin' here!

Goat Cheese Roasted Chicken

Serves 4-6 

5 pound fresh chicken, giblets removed
8 ounces goat cheese, slightly softened to room temperature
1/2 teaspoon dried basil
1/2 teaspoon dried oregano
1/4 teaspoon garlic salt
1/2 lemon
1 bulb garlic, top cut off
3-4 tablespoons olive oil
1/2 teaspoon salt
1/2 teaspoon pepper

Preheat oven to 425 degrees F. Pat chicken completely dry with paper towels.

In a bowl, combine goat cheese with herbs and garlic salt, mixing well until combined.

Rub the non-breast side of the chicken with 1-2 tablespoons of olive oil, then sprinkle with salt and pepper. Put that side down in a baking dish or roasting pan. 

Lift the skin of the chicken above the breast and stuff with goat cheese, pressing it into the thighs and as far back as possible. Rub the outside of the chicken with some goat cheese as well, using up the mixture. Rub with 1-2 tablespoons olive oil and sprinkle with salt and pepper. Stuff the garlic bulb, cloves-facing inward, in the top opening and the lemon, slice-side up, in the bottom opening. It's no biggie if they fall out while roasting!

Roast for 75 minutes, then remove and let rest for 30 minutes before cutting.  Enjoy!

Tuesday, July 23, 2013

Harvest Moon Flower Farm

It's safe to say that Sunday night was one of the best dates Ryan and I have been on during our six-year long relationship.  I visit our local farmers market every Saturday morning {well, at least on the weekends that I am not out of town for a wedding} and always stop by the sweetest flower seller named Linda's stall.  About a month ago as I was purchasing a bouquet from Linda, I started asking her more about the flowers.  She explained to me that her and her husband own a flower farm about an hour and a half outside of Indianapolis, and while it is not open to the public, she told me that they were having a Farm-to-Table Dinner in July in the middle of their flower farm.  Well as you can imagine I came running home to Ryan to see if he was interested, which he was, so we purchased tickets and anxiously awaited our trip out to the country.

On Sunday afternoon we started the drive to the farm, passing through quaint towns and miles upon miles of cornfields.  We arrived at Harvest Moon Flower Farm and were completely awe-struck by the beauty.  A small farm surrounded by gorgeous rolling fields, we were surrounded by thousands of flowers in every hue of the rainbow.  Linda and her husband welcomed the small group to the farm with appetizers {tomato gazpacho, carrot salad, and goat cheese and beet souffle} and drinks {homemade teas and an amazing whiskey sour made from a local distillery}.  They explained that they purchased the land over 25 years ago and since then have turned the flower farm into a successful family business.  

From there it was on to tour the farm.  Linda taught us about their sustainable farming methods {most of which are organic} and the business of flowers.  She showed us species after species of colorful blooms, allowing time for questions, photos, and simply admiring the beauty of Southern Indiana.  After the tour it was on to the main event, dinner!

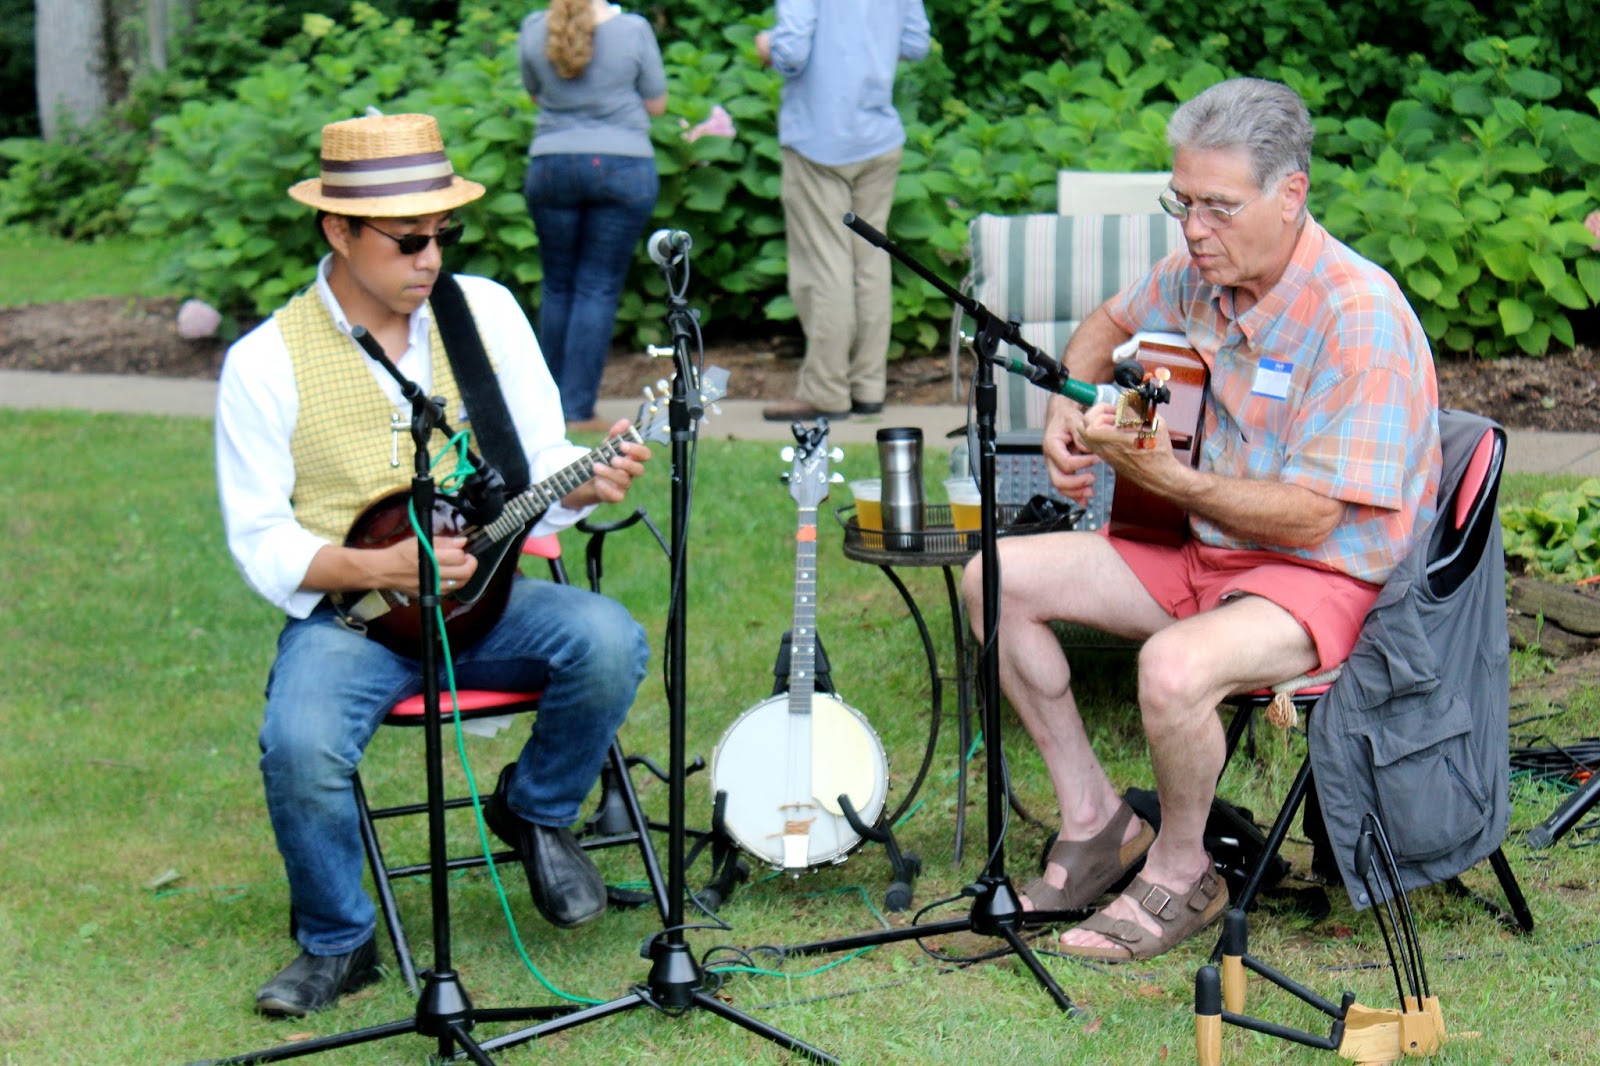
We dined under a tent surrounded by flowers listening to a musician play the banjo.  Local chefs created a wonderful gourmet picnic spread using all local ingredients.  Favorites included a creme fraiche chicken salad served on miniature house-made challah rolls with watermelon compote, a delicious local bean salad, and vegetable skewers.  For dessert we ate homemade angel food cake with fresh summer berry sauce and the most delicious peach ice cream that had just been churned that afternoon.  After our meal we sat by the fire listening to music and watching the sunset.  

It was an absolutely wonderful evening surrounded by good food, people, and flowers.  For a city-dweller like myself it was a much-needed evening away from the hustle and bustle of everyday life.  It's amazing how a few hours of fresh country air can refresh the soul.  I hope you enjoy my photos half as much as I enjoyed visiting the Harvest Moon Flower Farm!

PS - Follow Dreams in HD on bloglovin' here!